Google Web Fonts APIをAndroidでつかってみる
本エントリは、「Android Advent Calendar*1」という企画の1エントリにもなっています。他にも色々楽しいエントリが上がる予定なのでこちらの方もチェックしてみてください☆
Google Web Fonts APIってなに?
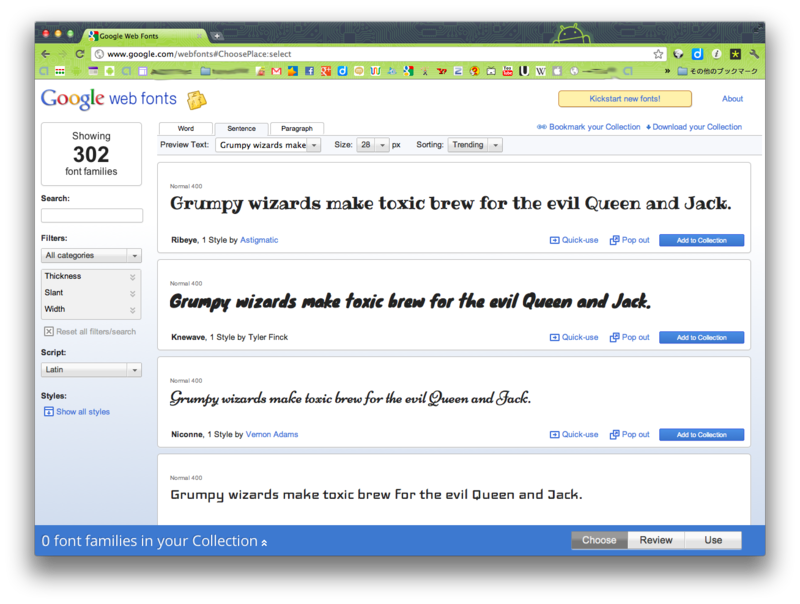
Google Web Fontsとは、Googleが提供するWeb Fontのホスティングサービスです。本日時点で、欧文フォントで302字体あります。ざっとこんな感じ。こんな種類の多いのでAndroidでも使ってみたくなってきますよね。
Androidで使ってみる。
Google Web Fonts は Android 2.2 以上対応となっています。通信が発生するのでパーミッションも必要です。AndroidManifest.xmlに追加します。
    <uses-sdk android:minSdkVersion="8" />
    <uses-permission android:name="android.permission.INTERNET" />
WebViewに表示させます。WebViewのレイアウトをレイアウトファイルmain.xmlに追加します。
    <WebView
        android:id="@+id/webview"
        android:layout_width="match_parent"
        android:layout_height="match_parent" >
    </WebView>
Google Web FontsはHTML内で以下のように指定することで使用できます。HEADタグの中がGoogle Web Fonts APIを使う為に必要です。装飾したい文字(INPUT_TEXT)を指定されたフォント(CSS_FONTTYPE)、指定されたサイズ(FONT_SIZE)で装飾します。大文字のところが任意で指定する部分です。
<html>
    <head>
        <link href='http://fonts.googleapis.com/css?family=FONT_TYPE' rel='stylesheet' type='text/css'>
        <style>body {color:#000;font-family: 'CSS_FONTTYPE', serif;font-size: FONT_SIZE;}</style>
    </head>
    <body>
        <p>INPUT_TEXT</p>
    </body>
</html>
このようなHTMLソースをロードするには、
- Androidではassetsにhtmlファイルをおいて読み出す方法
- ハードコーディングでデータをロードする方法
があります。今回は汎用性を考えて後者で実装します。ベースとなるHTMLソースをStringで定義しておき、指定箇所を置換します。
    private static final String FONT_BASEURL = "<html><head><link href='http://fonts.googleapis.com/css"
            + "?family=FONT_TYPE' rel='stylesheet' type='text/css'>"
            + "<style>body {color:#000;font-family: 'CSS_FONTTYPE', serif;font-size: FONT_SIZE;}</style>"
            + "</head><body><p>INPUT_TEXT</p></body></html>";

    private String fontType = "Ribeye Marrow";
    private String fontSize = "48px";
    private String inputText = "Shall we use Google Web Fonts API?";
「Ribeye Marrow」というフォントを使いたい場合には、linkタグの中では「Ribeye Marrow」と定義すればいいのですが、cssの中では「Ribeye+Marrow」とする必要があります。これを考慮して置換メソッドを用意し実装します。
    // 置換処理
    private String createUrl() {
        String output = FONT_BASEURL.replace("FONT_TYPE",fontType.replace(' ', '+'))
            .replace("CSS_FONTTYPE", fontType)
            .replace("FONT_SIZE", fontSize)
            .replace("INPUT_TEXT", inputText);
        return output;
    }
そしてこのデータをWebViewにロードします。
        WebView webview = (WebView) findViewById(R.id.webview);
        webview.setBackgroundColor(Color.TRANSPARENT);
        webview.loadDataWithBaseURL(null, createUrl(), "text/html", "utf-8", null);
実行するとWeb Fontが表示されました!
フォント一覧の取得方法
Web Fontの表示だけならAPI_KEYもいらないのですが、一覧を取得する際には必要となります。RESTFulなので、以下URLでリクエストするとJSONでレスポンスが返ってきます。
https://www.googleapis.com/webfonts/v1/webfonts?key=YOUR-API-KEY
JSONの構造はこんな感じです。
{
 "kind": "webfonts#webfontList",
 "items": [

  [...]

  {
   "kind": "webfonts#webfont",
   "family": "Anonymous Pro",
   "variants": [
    "regular",
    "italic",
    "bold",
    "bolditalic"
   ],
   "subsets": [
    "cyrillic",
    "cyrillic-ext",
    "greek",
    "greek-ext",
    "latin",
    "latin-ext"
   ]
  },
  {
   "kind": "webfonts#webfont",
   "family": "Anton",
   "variants": [
    "regular"
   ],
   "subsets": [
    "latin",
    "latin-ext"
   ]
  },

  [...]

 ]
}これをごりごりパースします。JsonPullParserとか使うと幸せになれるかもしれません。
API KEYの取得方法
API KEYを取得してない人のために取得方法も残しておきます。
- API Consoleにアクセス
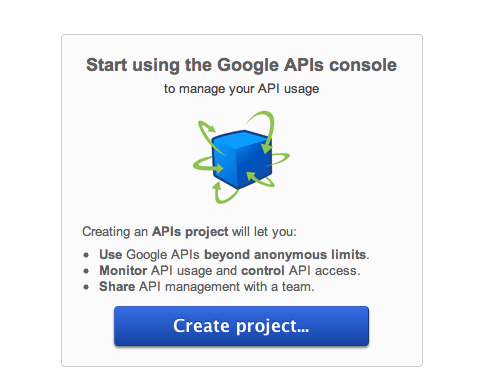
- プロジェクトを作成しますか?と聞かれるので作成する
メリットとデメリット
Androidでは普通アプリでシステムフォントと別のフォントを使いたい場合、assetsフォルダ配下におくのが定石です。しかしフォントを組み込むと、どうしてもアプリの容量が大きくなってしまいます。一般的に、アプリは5MBを超えると、ユーザはストレスを感じるといわれてます。そのためデベロッパーは、容量を犠牲にして美麗なアプリにするよりも、容量が大きくなることを避けがちな傾向にあります。
しかし、その点、Web Fontsだとアプリが軽量ですみます。ただデメリットとしては、通信が必要でローディングに少し時間はかかることがあげられます。またWebViewかブラウザでしか使用できません。メリット/デメリットに応じて使い分けてください。
最後に
今回初心者向けの内容になってますが、Google Web Fonts APIをいろんなところで積極的に使っていただきたくて、あえて書きました。個人的な意見ですが、Androidアプリはもっときれいで心地よいものになる余地が残されていると思います。
ていうか、もっと使おうぜ!チープだけどViewerアプリ作ったからさ!(ダウンロードはコチラ)これで電車の中でもAndroid端末からFont眺めてアプリの構想練れるぜ!作りが粗いのは勘弁してください時間がなかったんだもん。
サンプル
今回のサンプルソースを全文掲載しておきます。
- MainActivity.java
package org.superdry.sample.webfont;

import android.app.Activity;
import android.graphics.Color;
import android.os.Bundle;
import android.webkit.WebChromeClient;
import android.webkit.WebView;

public class MainActivity extends Activity {

    private static final String FONT_BASEURL = "<html><head><link href='http://fonts.googleapis.com/css"
            + "?family=FONT_TYPE' rel='stylesheet' type='text/css'>"
            + "<style>body {color:#000;font-family: 'CSS_FONTTYPE', serif;font-size: FONT_SIZE;}</style>"
            + "</head><body><p>INPUT_TEXT</p></body></html>";

    private String fontType = "Ribeye Marrow";
    private String fontSize = "48px";
    private String inputText = "Shall we use Google Web Fonts API?";

    @Override
    public void onCreate(Bundle savedInstanceState) {
        super.onCreate(savedInstanceState);
        setContentView(R.layout.main);
        WebView webview = (WebView) findViewById(R.id.webview);
        webview.setBackgroundColor(Color.TRANSPARENT);
        webview.loadDataWithBaseURL(null, createUrl(), "text/html", "utf-8", null);
    }

    // 置換処理
    private String createUrl() {
        String output = FONT_BASEURL.replace("FONT_TYPE",fontType.replace(' ', '+'))
            .replace("CSS_FONTTYPE", fontType)
            .replace("FONT_SIZE", fontSize)
            .replace("INPUT_TEXT", inputText);
        return output;
    }
}
- main.xml
<?xml version="1.0" encoding="utf-8"?>
<LinearLayout xmlns:android="http://schemas.android.com/apk/res/android"
    android:layout_width="fill_parent"
    android:layout_height="fill_parent"
    android:background="@android:color/background_light"
    android:orientation="vertical" >

    <WebView
        android:id="@+id/webview"
        android:layout_width="match_parent"
        android:layout_height="match_parent" >
    </WebView>

</LinearLayout>
- AndroidManifest.xml
<?xml version="1.0" encoding="utf-8"?>
<manifest xmlns:android="http://schemas.android.com/apk/res/android"
    package="org.superdry.sample.webfont"
    android:versionCode="1"
    android:versionName="1.0" >

    <uses-sdk android:minSdkVersion="8" />

    <uses-permission android:name="android.permission.INTERNET" />

    <application
        android:icon="@drawable/ic_launcher"
        android:label="@string/app_name" >
        <activity
            android:configChanges="orientation|keyboardHidden"
            android:label="@string/app_name"
            android:name=".MainActivity"
            android:screenOrientation="portrait" >
            <intent-filter >
                <action android:name="android.intent.action.MAIN" />

                <category android:name="android.intent.category.LAUNCHER" />
            </intent-filter>
        </activity>
    </application>

</manifest>


